The editor and fields
Add, configure and organize the questions in a form.
Use the Build tab to create the content of your form. The preview in the middle shows the form as your visitors will see it.
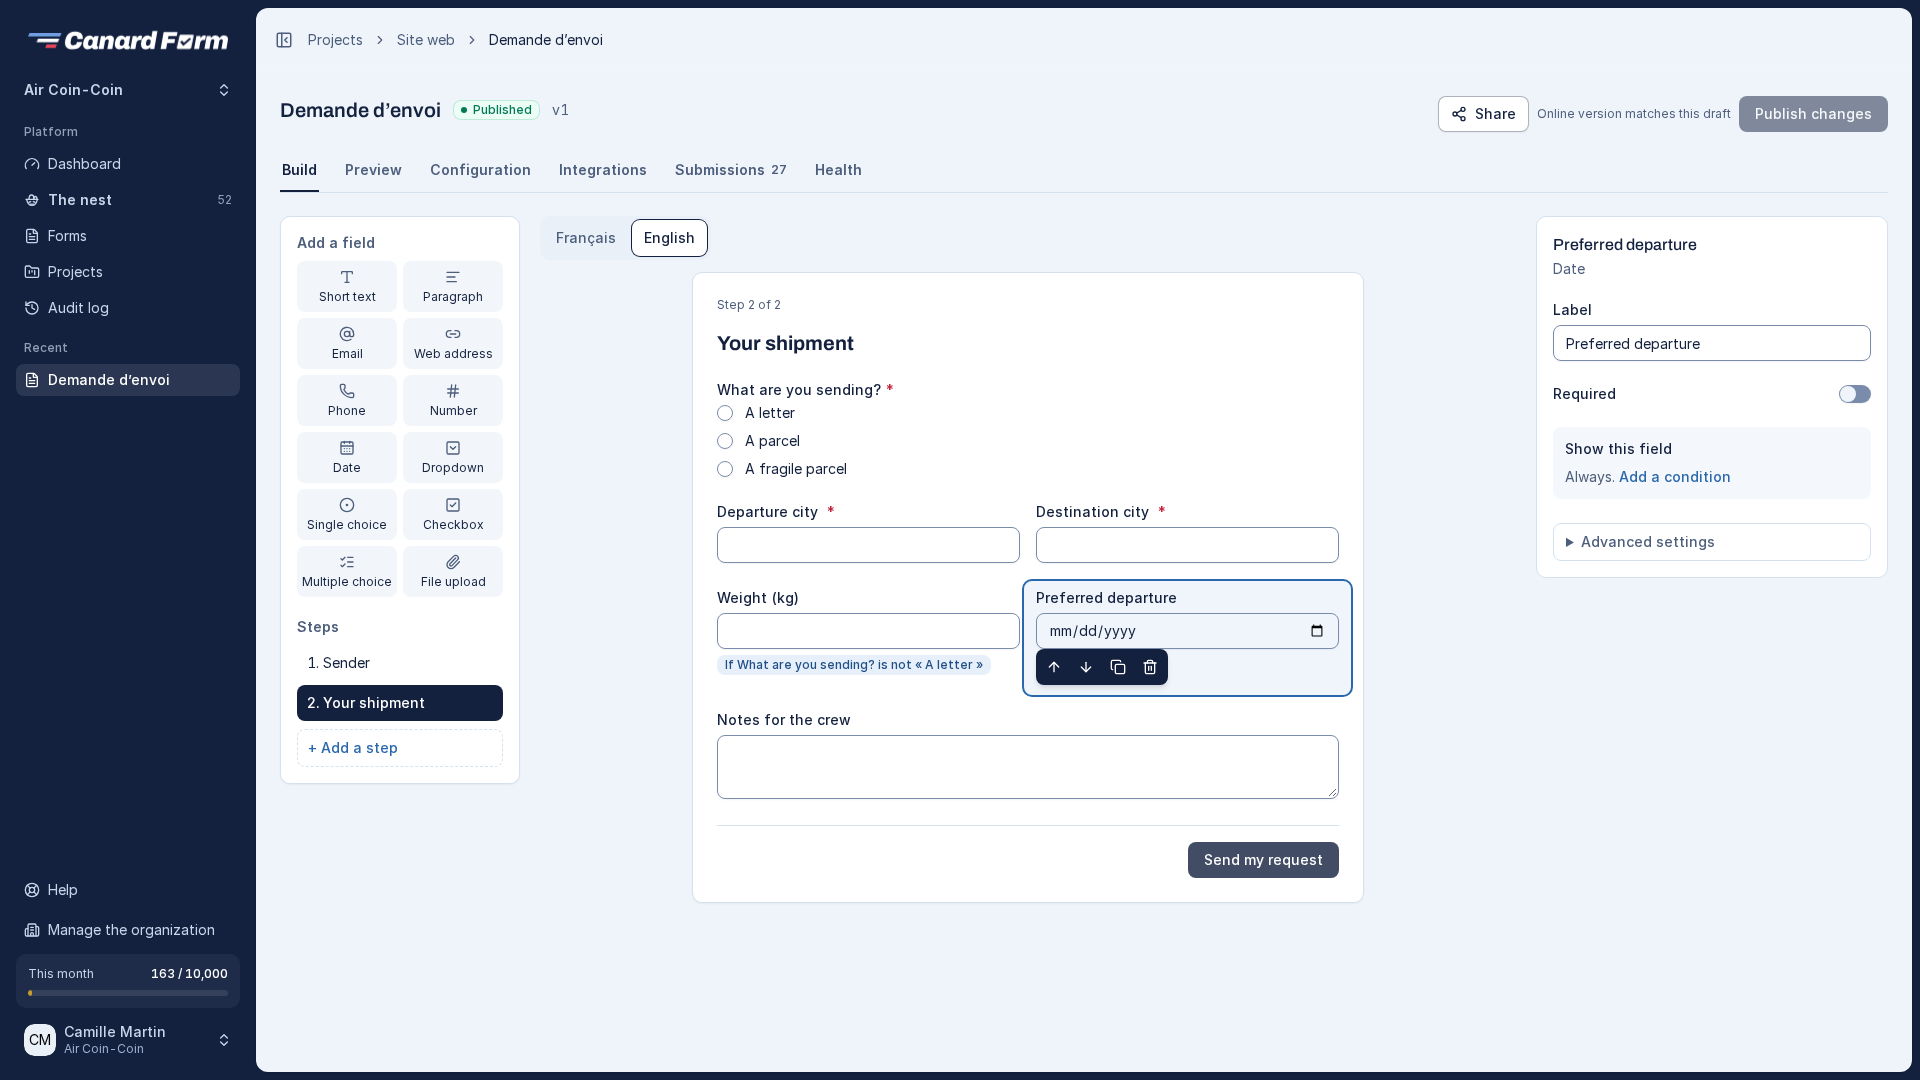
Add a field
Click a field type under Add a field. The field is added at the end of the current step.
| Field | Use |
|---|---|
| Short text | A name, a city, a reference |
| Paragraph | A message, a description |
| An address checked for format, useful to reply to the visitor | |
| Web address | A website, a link to a portfolio |
| Phone | A number, typed freely |
| Number | A quantity, a budget, with a minimum and maximum |
| Date | A calendar day (no time, no time zone) |
| Dropdown | One choice among many options |
| Single choice | One choice among a few options, all visible |
| Checkbox | An agreement, a confirmation |
| Multiple choice | Several choices possible |
| File upload | Attachments (see The File upload field) |
| Hidden field | A source, a campaign: never shown to the visitor |
The hidden field
A hidden field is never shown to the visitor. It saves a piece of information with the answer, for example where the person came from: a newsletter, an ad, a specific page of your site.
It fills itself, in this order:
- the value sent by your site, if it provides one (see the developer guide);
- otherwise, the parameter of the page address: with Filled from the page address set to
utm_source, the page…?utm_source=newslettersaves "newsletter". By default, the parameter has the same name as the field key; - otherwise, the Default value.
The value is saved as is, up to 255 characters. A hidden field is never required and never blocks sending. It shows up like the other answers in the nest, exports, the API and webhooks. Embedded with the script from the Integrations page, the form receives the parameters of the address of the page that hosts it.
Configure a field
Select a field in the preview. Its settings appear on the right:
- Label: the text of the question.
- Required: the visitor must answer before submitting the form.
- Help text and Placeholder: hints that guide the visitor.
- Width: full or half width, to place two fields side by side.
- Information asked: what the field asks the person for (name, first name, e-mail, phone, address, city, postal code…). The visitor's browser can then fill it in for them, which saves everyone time and helps people with disabilities a lot. For an E-mail, Phone or Website field, it is automatic.
- Show this field: always, or only under a condition (see Steps and conditions).
- Advanced settings: the field key, used in exports, webhooks and the API. Change it before you publish. After that, keep it unchanged so you don't break your integrations.
Organize fields
Hover over a field to show its toolbar. You can move it up, move it down, duplicate or delete it.
If you delete the email field used for the automatic reply, Canard Form shows a warning. When you publish, the automatic reply is turned off until you choose another email field.
Edit the form texts
Select a step (not a field) to edit the general texts: step title, submit button text, confirmation message after submission, and the message shown when the form is closed.
Automatic saving
Every change is saved in the draft one second after you stop typing. The header shows "Draft saved". Visitors see nothing until you publish (see Publish and manage versions).